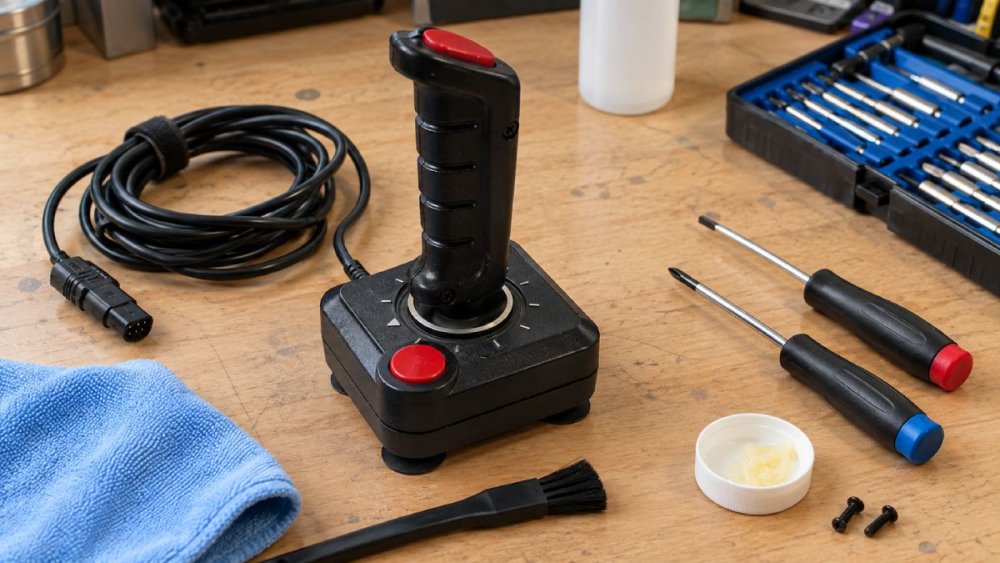
The old joystick at the bottom of the loft box may look like little more than black plastic, a curled lead and a fire button that has seen better days. Yet for anyone who spent Saturdays wrestling with Daley Thompson’s Decathlon or trying to make Jet Set Willy behave, it is a direct line back to the Spectrum’s rubber keys, flashing loading screens and the familiar clatter of a cassette deck. To restore Sinclair joystick safely, treat it less like a disposable controller and more like the small, slightly temperamental artefact it is.
A careful clean and a few modest repairs can often bring a tired stick back into service. The temptation is to attack it with lubricant, a soldering iron and heroic optimism. Resist that urge. Most faults are simple, while most permanent damage comes from rushing, using the wrong cleaner or forcing four-decade-old plastic.
Start by identifying what you have
Sinclair did not produce one single joystick design that covered every Spectrum setup. The original ZX Spectrum was designed around keyboard controls, so players commonly used third-party sticks and interfaces. You may have a QuickShot with its chunky red buttons, a Competition Pro, a Kempston-style stick, a Sinclair-branded unit, or a joystick that plugs into an Interface 2 for games using a cursor or Sinclair joystick port.
That distinction matters before any testing. A joystick wired for one standard may not work on another, even when its plug fits the socket. Common Spectrum arrangements include Kempston, Sinclair Interface 2 ports, cursor controls and fuller keyboard emulation. Do not assume a non-responsive stick is broken until you know which system it was intended for.
Look closely at the plug, cable exit, case markings and any interface you own. Photograph everything before opening the case, especially the wiring around the switch assembly. A quick photograph can save a surprising amount of head-scratching when a red wire has slipped loose and the memory of its original position has vanished.
Make the workspace safer than the repair
Unplug the joystick from the Spectrum, interface and mains power before you do anything. The controller itself is normally low voltage, but no vintage computer should be opened or connected while you are cleaning or repairing an accessory. Give yourself a clear table, decent light and a shallow tray for screws. The small self-tapping screws used in many period joystick cases have an uncanny ability to roll under a sideboard.
Use a soft cloth beneath the joystick to avoid scratching the case. If the plastic feels chalky, warped or brittle, work even more slowly. ABS cases can survive years of enthusiastic waggling yet crack when a modern owner overtightens one screw.
For the initial clean, a dry soft brush and a microfibre cloth are usually enough. Slightly dampen the cloth with water for general grime, keeping moisture away from openings and never soaking labels. For sticky residue on the outside only, use a small amount of mild washing-up liquid in water, then wipe again with a clean damp cloth and dry thoroughly.
Avoid acetone, nail-varnish remover, strong solvents and abrasive cream cleaners. They can cloud plastic, strip printed legends and turn a pleasingly original joystick into something that looks as though it has been rescued from a chemistry lesson.
Open the case without making a new fault
Remove the screws with a screwdriver that fits properly. A poor fit rounds screw heads, and a replacement screw rarely looks quite right. Keep each screw aside in the order it was removed if the lengths differ.
Once the screws are out, do not lever the halves apart with force. The cable may be clamped inside, and the fire button, microswitches or metal leaf contacts may be positioned in a way that makes the case feel stuck. Ease the shell open a few millimetres and look inside before separating it fully.
This is where the photograph pays off. Check for loose wires, cracked solder joints, compressed springs, corrosion and damaged insulation. A failed cable is especially common near the plug and where it enters the case. Gently flexing those areas can reveal a break, but do not repeatedly bend old cable in the hope that it will mend itself. It will not.
If you see green or white corrosion around a switch contact, use a cotton bud sparingly moistened with high-percentage isopropyl alcohol. Apply it to the contact, not to the whole interior. Let it evaporate completely before reassembly. For ordinary dust, a dry brush is kinder and usually sufficient.
Do not spray cleaner everywhere
Contact cleaner has a place, but it is not a magic potion. Flooding a joystick with aerosol cleaner can wash dirt deeper into the mechanism, leave residue, affect plastics or make future diagnosis harder. If a microswitch is genuinely intermittent, a very small, targeted application of a plastic-safe electrical contact cleaner may help. Test it only after it has fully dried.
With leaf-switch joysticks, inspect the metal strips for dirt and alignment. They need to meet cleanly when the shaft moves, but bending them aggressively can leave the stick permanently registering a direction. A gentle adjustment is sometimes appropriate; if you are unsure, leave their shape alone and clean first.
Test the joystick before soldering
The best test is a multimeter set to continuity, used with the joystick disconnected from the computer. Check each direction and the fire button while consulting the wiring standard for your particular model. The reading should change cleanly as each switch is pressed or moved.
A multimeter separates a mechanical problem from a compatibility problem. If the switch closes correctly at the joystick but the game ignores it, the issue may be the interface, the port standard or the game’s control settings. Plenty of Spectrum games supported only keyboard input, or offered several options on the title screen that were easy to miss in the excitement of getting the tape to load.
If you do not own a meter, test cautiously on known-compatible hardware after the joystick is dry and reassembled. Do not plug and unplug it repeatedly with the Spectrum powered on. Switch the machine off, connect the stick, then power up. It is a small habit that reduces the chance of accidental shorts at a fragile vintage port.
When a wire needs attention
A detached wire or visibly cracked solder joint can be repairable, but this is the point at which confidence matters. Use a temperature-controlled soldering iron, work quickly and avoid heating the switch terminals or cable insulation for too long. Excess heat can melt the plastic housing or loosen a terminal from the board.
Match the original wire positions exactly using your photographs. If the cable insulation has hardened or split in several places, replacing the entire lead is safer than patching it with multiple joins. Choose flexible cable of an appropriate type and add strain relief where the cable leaves the case. The goal is not merely to make it work on the bench, but to stop the fault returning the first time somebody pulls the joystick towards the sofa.
If soldering feels beyond your comfort zone, there is no shame in stopping there. A local electronics repairer or a knowledgeable retro-computing club member can often deal with one broken connection in minutes. Preserving an original controller is worth more than proving a point with a soldering iron.
Reassemble gently, then enjoy the result
Before closing the case, make sure no wire is trapped beneath a screw post or caught in the cable clamp. Check that the stick returns to centre freely and that the fire button moves without sticking. Refit the case halves, then tighten screws only until they are snug. Overtightening can strip old plastic posts, leaving the joystick with a permanent rattle.
Once it is connected to the correct interface, choose a game with clear joystick controls and test every direction deliberately. A restored joystick may feel different from a modern pad: noisier, stiffer and gloriously less polite. That is part of the deal. These were the controls we gripped through impossible platformers, racing games that punished the slightest twitch and sporting events capable of wrecking a family afternoon.
A safe restoration does not need to make a Sinclair-era joystick look factory-fresh. A little wear on the case and a softened fire button tell the story of the tech we grew up with. Clean away the grime, repair what is genuinely failing, and leave the honest character intact. Then give it the proper test: one more go, just to see whether those old reflexes are still there.